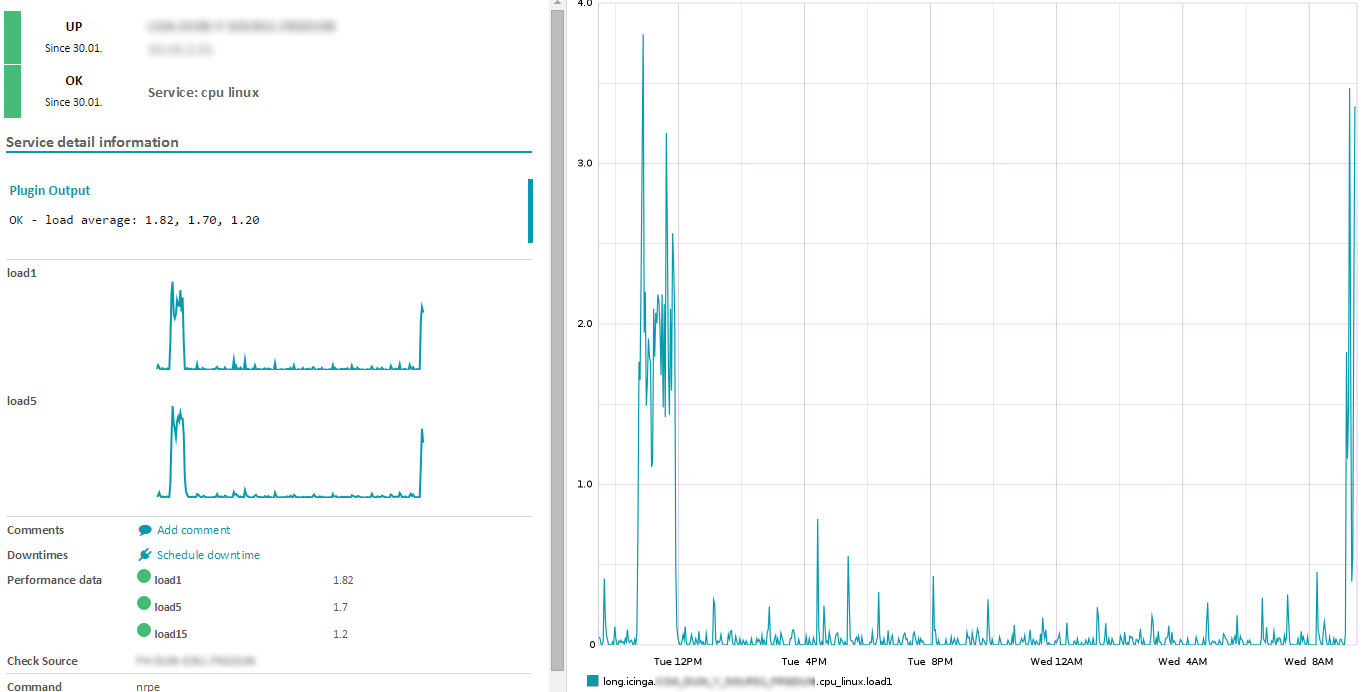
Your Icinga2 is up and running? Nice, let's add some graphs. That's how our icinga should look like with graphite
Bye the way you can easily use pnp4 instead of graphite if you just want to show some graphs. I prefere graphite because I want to add grafana in some weeks (AND I think it looks much nicer)
For this example im running
- Debian 8
- Icinga2
- Icingaweb2
- Apache2 2.4
- Graphite 0.10
- Phyton 2.7
I will install Graphite on a separate system. My graphite meta-data will be stored in a MySQL Database. You can store the data localy if you want. Please check the official docs.
1. Graphite
Prerquisites
sudo apt-get update
apt-get install python2.7 python-pip python-dev python-cairo \
python-django python-django-tagging apache2 libapache2-mod-wsgi \
python-twisted python-memcache python-pysqlite2 python-simplejson
Install
If you want to connect to a MySQL Database instead of the local SQLite3
apt-get install libmysqlclient-dev
pip install mysql-python
Install graphite-web, carbon and whisper with pip
pip install https://github.com/graphite-project/whisper/tarball/master
pip install https://github.com/graphite-project/carbon/tarball/master
pip install https://github.com/graphite-project/graphite-web/tarball/master
The default install location is /opt/graphite
Config
We copy the example configs
cd /opt/graphite/conf/
cp graphite.wsgi.example graphite.wsgi
cp carbon.conf.example carbon.conf
cp storage-schemas.conf.example storage-schemas.conf
cp storage-aggregation.conf.example storage-aggregation.conf
cd /opt/graphite/webapp/graphite
cp local_settings.py.example local_settings.py
Edit the local_settings.py file, add your timezone
nano local_settings.py
TIME_ZONE = 'YourTimeZone'
For Example
TIME_ZONE = 'Europe/Zurich'
That's pretty important otherwise the measurement points will have the wrong timestamp.
To find the correct Name of your timezone you can run this
ls /usr/share/zoneinfo/
/opt/graphite/conf/storage-schemas.conf
Add those lines to the top of your config file
[icinga2_internals]
pattern = ^icinga2\..*\.(max_check_attempts|reachable|current_attempt|execution_time|latency|state|state_type)
retentions = 5m:7d

[icinga2_default]
pattern = ^icinga2\.
retentions = 5m:10d,30m:90d,360m:4y
Carbon Autostart
The last piece to complete the graphite config. We want the carbon service to autostart. I couldn't figure out an easy way. I had to download and register an init script.
Get the file
cd /etc/init.d
wget https://gist.githubusercontent.com/martinseener/5ddb8c47209bb9569c9e/raw/82eab3547db8569c05ea0e7a310bcaec48ad7db7/carbon-cache.sh
chmod +x carbon-cache.sh
and register the start script
update-rc.d carbon-cache.sh defaults
As I'm a Linux newbie...there might be a better way. Let me know in the comment section.
2. Apache
Config
We copy a config example to the apache sites-available folder. The new config will be called graphite.conf
wget https://raw.githubusercontent.com/graphite-project/graphite-web/master/examples/example-graphite-vhost.conf -O /etc/apache2/sites-available/graphite.conf
/etc/apache2/sites-available/graphite.conf
Open /etc/apache2/sites-available/graphite.conf
Search for WSGISocketPrefix, change the line to
WSGISocketPrefix /var/run/apache2/wsgi
If you run Icingaweb2 and Graphite on the same system, please change the port of the Virtual host. Port 80 is mostly already occupied by Icingaweb2. For Example 8000.
<VirtualHost *:8000>
Next issue. The access to the static content path is not allowed. If you open the webpage the browser can't find the img, js...

I had to allow the access to the static folder
<Directory /opt/graphite/static/>
    Require all granted
</Directory>
Save the file and close it.
If there are some files missing, try running this
export GRAPHITE_ROOT=/opt/graphite
PYTHONPATH=$GRAPHITE_ROOT/webapp django-admin.py collectstatic --noinput --settings=graphite.settings
This will copy again all the static content to /opt/graphite/static
Enable the wsgi mode
a2enmod wsgi
Disable the default apache page
a2dissite 000-default.conf
Enable the graphite site.
a2ensite graphite
We need to give the www-data user access to the storage folder
chown -R www-data:www-data /opt/graphite/storage/
Restart apache
/etc/init.d/apache2 restart
3. Database
Login to your mysql server. Create the db and the user
mysql -u root -h MYSQLHOST -p
CREATE DATABASE graphite;
CREATE USER graphite@localhost IDENTIFIED BY 'myGraphitePassword';
GRANT ALL PRIVILEGES ON graphite.* TO graphite@SERVER;
EXIT
Edit the connection settings
nano /opt/graphite/webapp/graphite/local_settings.py
DATABASES = {
    'default': {
        'NAME': 'graphite',
        'ENGINE': 'django.db.backends.mysql',
        'USER': 'graphite',
        'PASSWORD': 'PASSWORD',
        'HOST': 'SERVER',
        'PORT': ''
    }
}
Update & create database tables.
export GRAPHITE_ROOT=/opt/graphite
PYTHONPATH=$GRAPHITE_ROOT/webapp django-admin.py migrate --settings=graphite.settings --run-syncdb
4. Icinga
Switch over to the Icinga2 Server
Config
icinga2 feature enable graphite
Edit the graphite config
nano /etc/icinga2/features-enabled/graphite.conf
library "perfdata"

object GraphiteWriter "graphite" {
  host = "GraphiteHostIPAdress"
  port = 2003
  enable_send_thresholds = true
  enable_send_metadata = true
}
Next you need to install Icingaweb2 module
cd /usr/share/icingaweb2/modules
git clone https://github.com/findmypast/icingaweb2-module-graphite
mv icingaweb2-module-graphite graphite
Create configuration file in /etc/icingaweb2/modules/graphite
cd /etc/icingaweb2/modules/graphite
nano config.ini
Paste the config. Add your Graphite Hostname. If you set a different port for graphite, add the port as well (Optional).
[graphite]
metric_prefix = icinga
base_url = http://HOSTNAME:PORT/render?
Activation
To activate Graphite, go to your IcingaWeb2 Dashboard.
Configuration -> Modules -> graphite, click on Enable
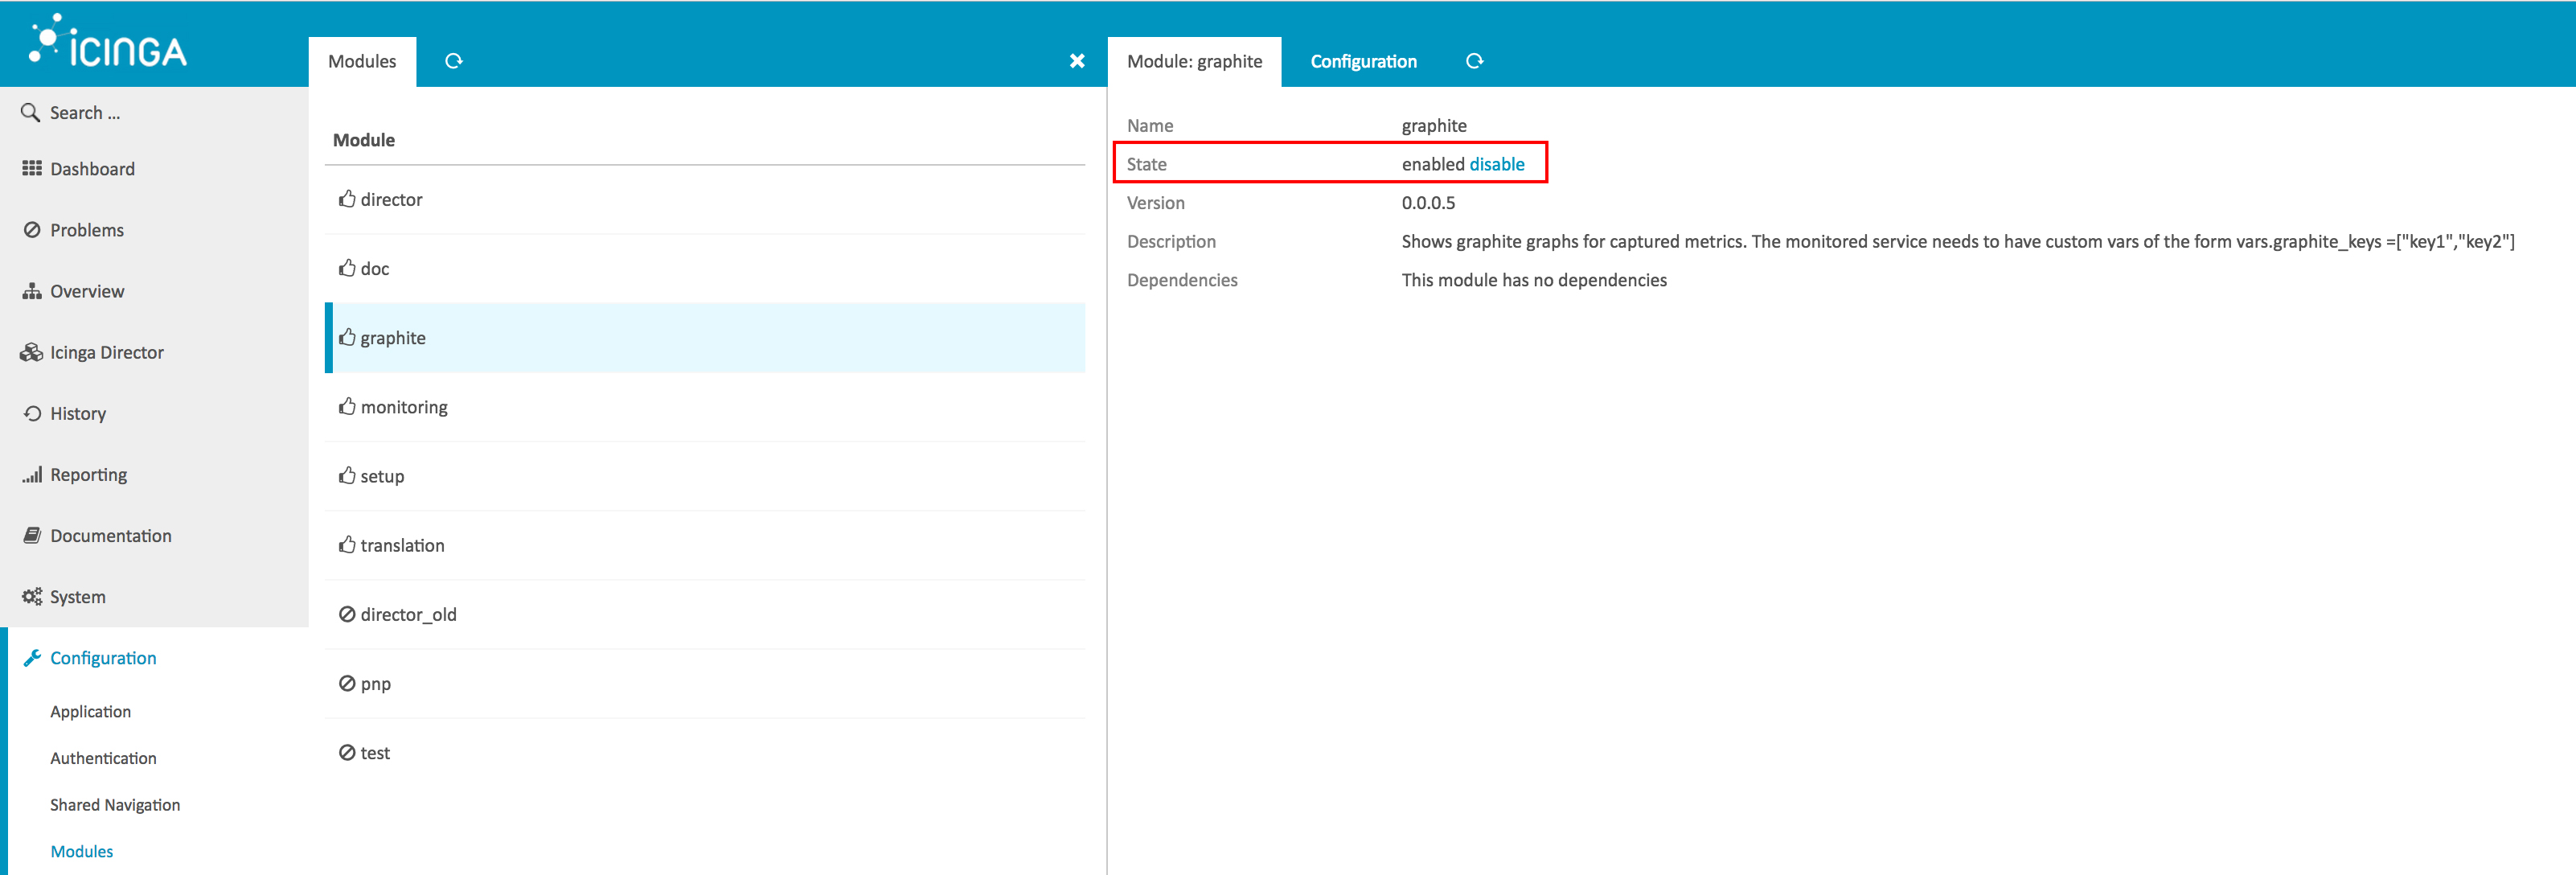
We are done with the installation. Long may he graph!
5. Admin
Just some useful commands
Carbon
start/stop manually
/opt/graphite/bin/carbon-cache.py start
/opt/graphite/bin/carbon-cache.py stop
6. Post Updates
This Post was updated:
- 5.05.2017, Added the activation section